Integrations
Framer
Publish to a Framer CMS collection.
Sync articles into your Framer site's CMS — each becomes a real Framer page. Two ways to connect:
- Framer Plugin (recommended): install the Grandranker plugin in the editor, sync into an "Articles" collection.
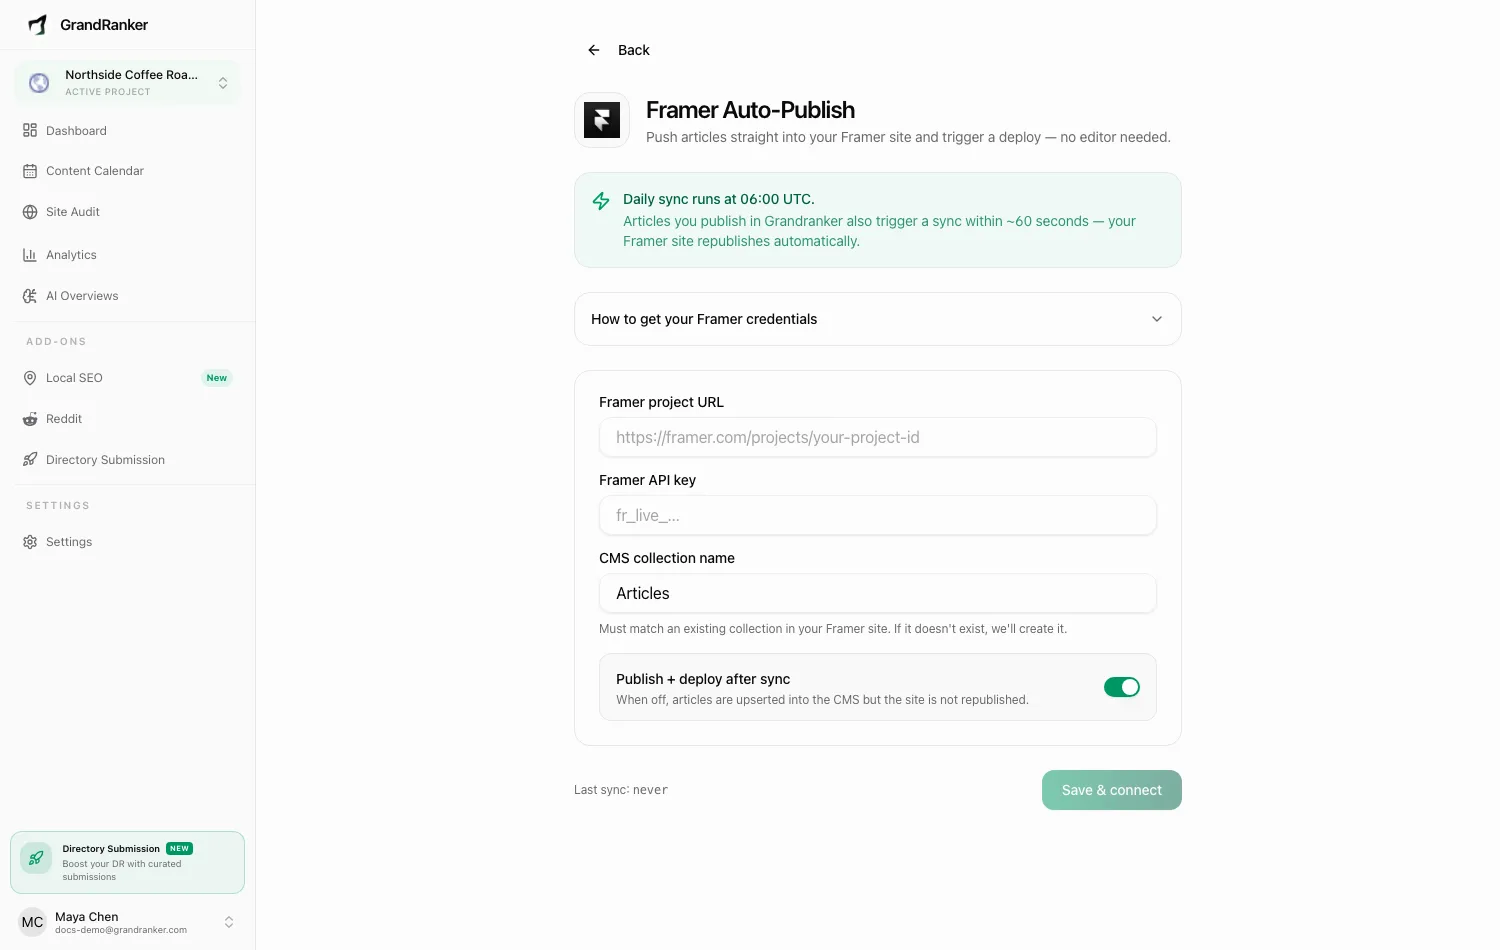
- Framer Auto-Publish (Server API): hands-off — Grandranker pushes articles and triggers a deploy, no editor needed.
What you need: edit access to your Framer project. For Auto-Publish, you also need a Framer API key from Site Settings. The Framer Server API is currently in open beta and free.
How to Connect
Framer Plugin
- In Grandranker, open Integrations → Add New Integration at app.grandranker.com/integrations/create and pick Framer Plugin.
- In Framer, choose Plugins → Open Plugin from URL and paste the plugin URL shown in Grandranker.
- Click Generate token in Grandranker — scopes the plugin to this domain's articles. Copy it now, it won't show again.
- In the plugin panel, paste the token, pick your domain, click Sync articles.
- An "Articles" collection appears. Bind a CMS detail page to it and every article becomes a real page at
/<slug>.
Re-running Sync is safe: articles match by ID and upsert in place. New schema fields are added; existing ones are never removed.
Framer Auto-Publish (Server API)
- In Framer, go to Site Settings → General → API and generate an API key (shown only once).
- Copy your project URL from the address bar (
https://framer.com/projects/abc123…). - In Grandranker, pick Framer on the Add New Integration page and paste the project URL and API key.
- Set the CMS collection name (default
Articles) — must match an existing collection, or Grandranker creates it. - Choose whether to enable Publish + deploy after sync. Off means articles upsert but the site isn't republished.
- Click Save & connect.
Publishing & Verifying
Plugin: articles arrive when you click Sync articles. Auto-Publish: a daily sync runs at 06:00 UTC, and publishing an article triggers a sync within ~60 seconds; your site republishes automatically. Sync now works anytime and shows the last sync timestamp.
To verify, check the Articles collection in Framer's CMS panel, then confirm pages render at their /<slug> URLs on your published site.
Troubleshooting
Articles are in the CMS but not on the live site
- Plugin: bind a CMS detail page to the Articles collection, and publish the site in Framer.
- Auto-Publish: check Publish + deploy after sync. Off means the CMS updates but the site doesn't republish.
The connection token or API key was lost
Both are shown only once. Plugin: click Generate a new one and paste it into the plugin panel. Auto-Publish: generate a fresh key in Framer's Site Settings → General → API and save it.
Sync created a second collection
CMS collection name must exactly match your existing collection (default Articles) — a different name creates a new one.
Last sync says "never"
Not run yet. Click Sync now, or publish an article to trigger a sync. Still stuck? Re-check the project URL and API key.
Still stuck? [email protected]